
A workflow is a sequence of actions, timed to go one after the other, based on specific actions or triggers. This means, for example, you can send out a series of SMS and/or emails across hours and days as a new lead comes in. Workflows are usually based on a lead being changed to a predetermined status to start a contact strategy.
A common example of this would be as a new lead comes in, initial contact is attempted via a trigger and if there is no answer or reply this would start a workflow of new contact attempts across the following days and weeks.
Workflows are found within the triple cog icon within HubSolv's side navigation bar.
To create the workflow, complete the necessary information on the page and you will then be directed to where you can build your actions.
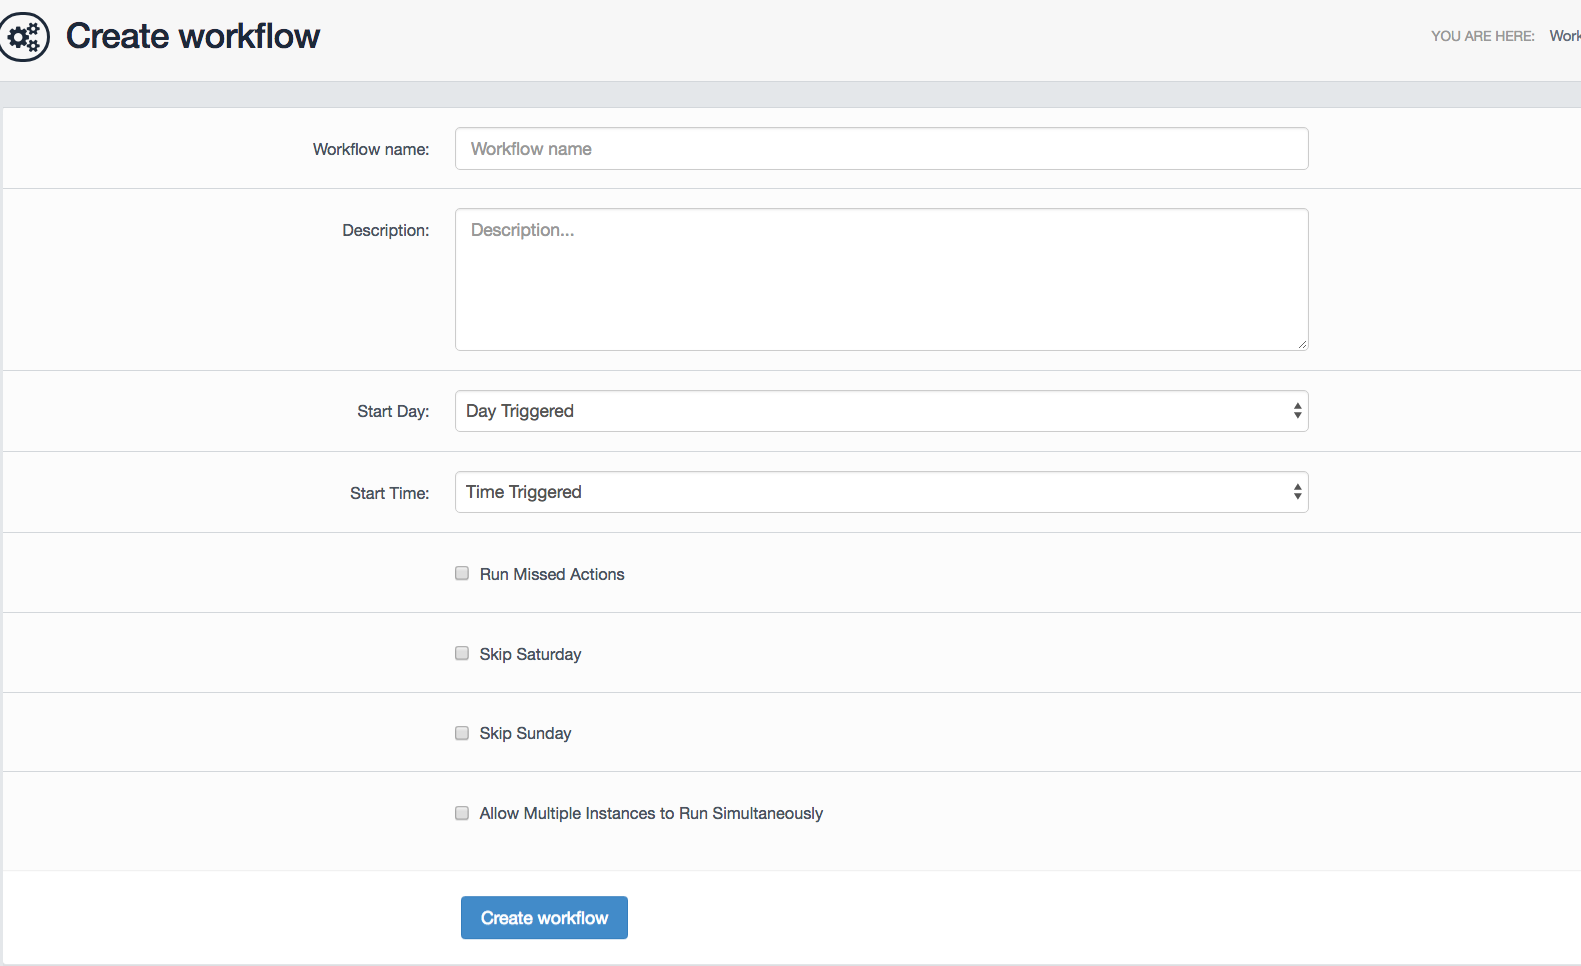
- Workflow Name
- Make this relevant to the actions, so that you can then easily identify it.
- Description
- You can enter a description for your workflow, such as the main purpose of the workflow you are creating.
- Start Day
- You can schedule the workflow to start on a specific date (up to within the next 6 years).
- Start Time
- You can also pick the exact time you want the workflow to start. This means if for example the workflow is set to start at 09:00 and the current time is 12:00, the workflow will not start until the following day at 09:00.
- Run Missed Actions
- This will run the actions that the workflow might have missed due to time delays. The workflow will allow you to set up events happening in the past for various reasons, such as tasks being scheduled before the workflow was generated.
- Skip Saturday/Sunday
- This option will prevent the workflow from running specific actions over the weekend.
- Allow Multiple Instances to Run Simultaneously
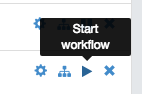
- Once the workflow has been created, it will be paused by default. Click the play button in the actions area to start the workflow.
Creating the Actions
Once you have entered your setting for the workflow, you can build actions which are very similar to how triggers work, with the exception that it allows for waiting times between each action, based on days or hours.
When you add an action, select the cog icon to bring up action configuration. Here you can select what you want your workflow to do I.e. send an SMS after 1 day.
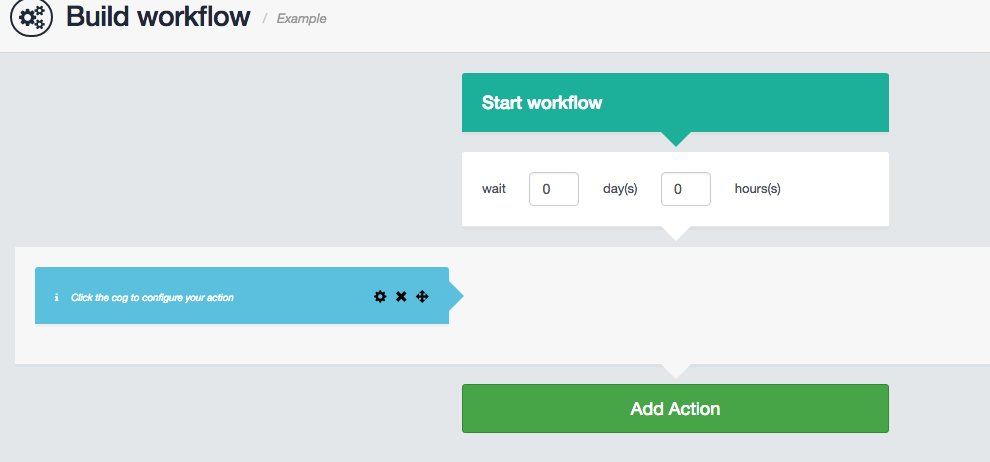
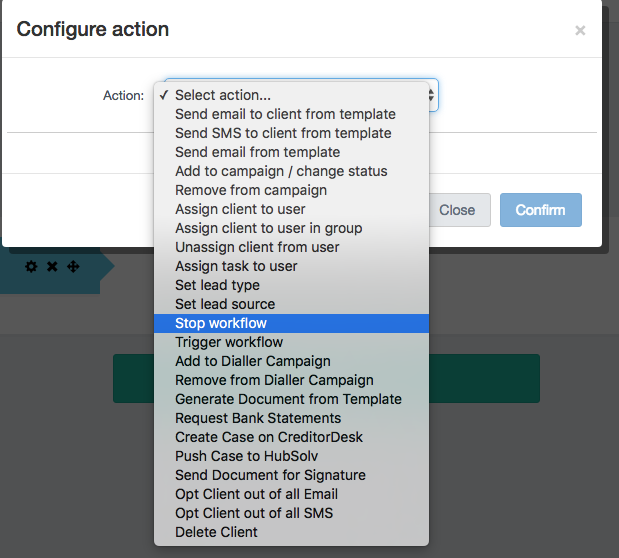
Once the action is set, you can restrict the action based on conditions within the system, such as statuses.
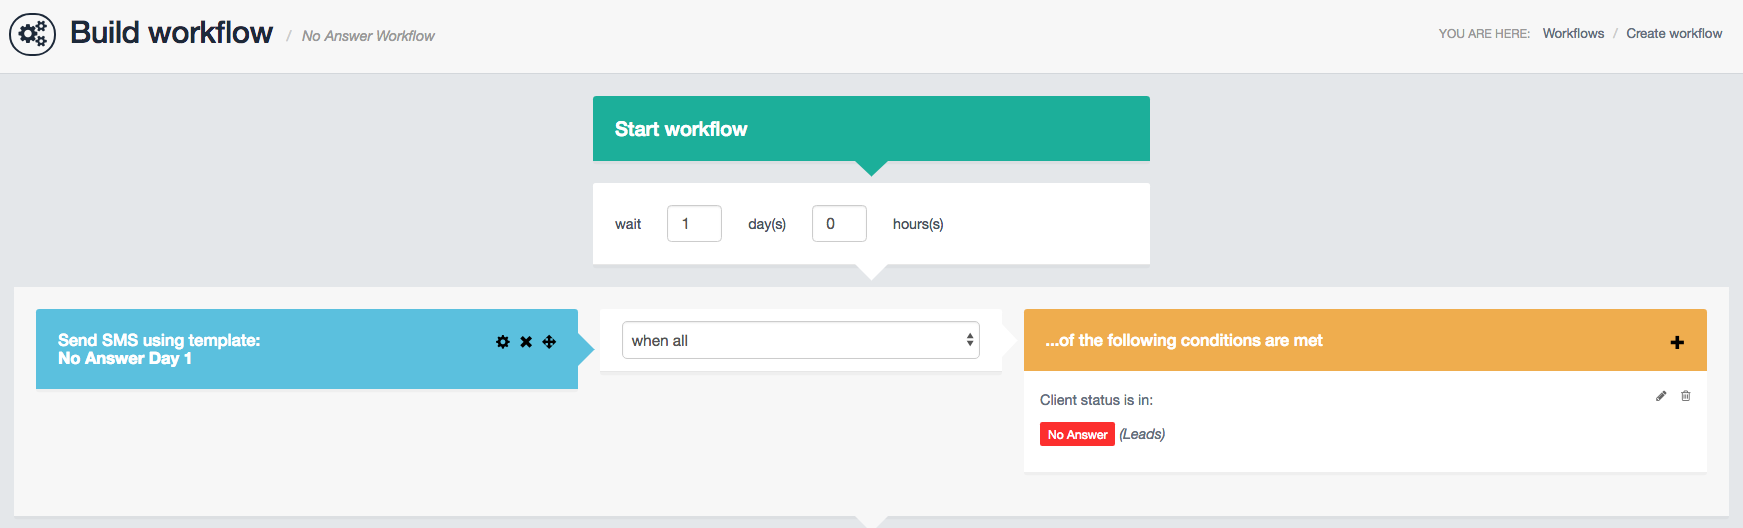
In this example, The SMS template 'No Answer Day 1' will be sent to clients who are moved to 'No Answer' status after a day has passed.
If you find yourself wanting to stop these workflows at any point, we have a trigger action called 'Stop Workflows'.
Comments
0 comments
Article is closed for comments.