
Triggers are designed to automate actions, to help you manage time and cases more effectively. A Trigger is a function within your campaigns enabling your HubSolv to respond to changes to client records within that given campaign.
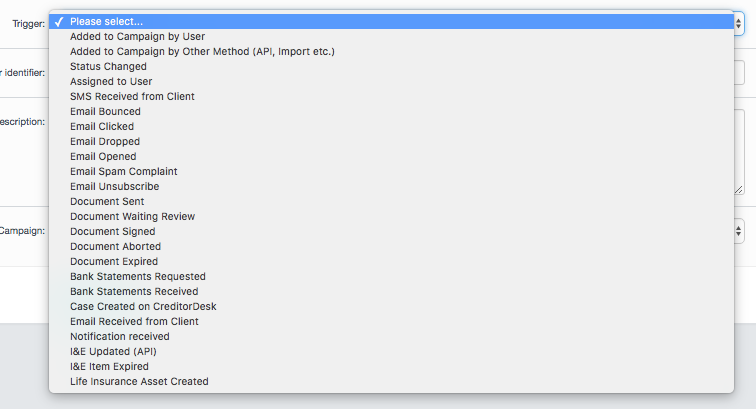
In HubSolv you can select from over 25 triggers to automate actions following certain events relating to different stages of your sales or product lifecycle. Click the link here to view a list of Triggers along with examples of them in use.
Terminology
- Trigger
- What needs to happen for an action to be performed
- Action
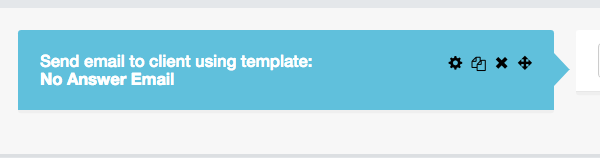
- This is what happens when that trigger occurs, for example, you want to email the client with a message when the client status changes from 'Not Contacted' to 'No Answer'.
- Condition
- This is what has to occur before the action can go through. Using the same trigger example as above, the condition would be based on the client status 'No Answer'


Creating The Trigger
To create a trigger, navigate to your campaign list page where you can see your campaign actions and select the 'edit trigger' action.

From here, select 'New Trigger' and you will then be tasked with detailing what you would like to trigger.
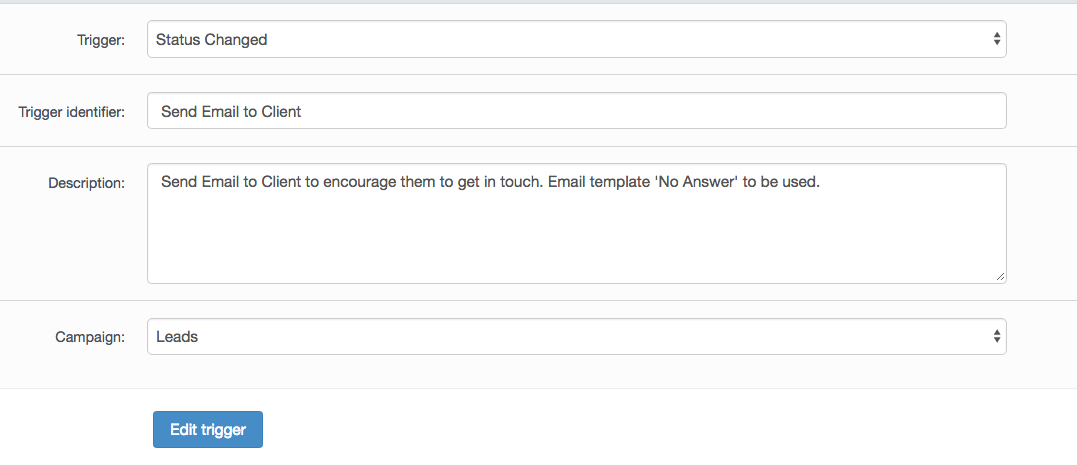
The trigger action, name and description should all be filled out with the relevant information. Once again, using the same example as above (trigger to send an email to a client when they have the status 'No Answer'), you can inform other users about what this trigger does within the description and it'll appear in the Trigger list.
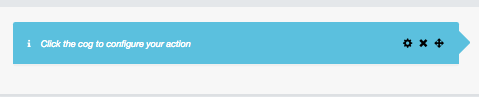
When you create a trigger it will be paused by default. To start this trigger click the enable (play) button and any action within that trigger will start to be carried out within HubSolv.

Once you submit your action and then the condition for that action to be performed, you will be fully set up with the trigger. With the example of sending an email to the client, be sure to have an email template set up prior to creating the trigger. You can find more on templates by clicking here.

You can include multiple actions within one trigger if, for example, you would like to send out different email templates depending on which status/source etc that the client has. This can be done by clicking 'add action' and the same options in regards to actions and conditions will be available for you again. Be sure to go back to your trigger list page within your campaign to enable the trigger as discussed above.
Once you have an understanding of how Triggers can help automate your process, you can then create Workflows which are designed to perform actions based on a specific time frame as determined by you. You can read more about Workflows here.
Comments
0 comments
Article is closed for comments.