With HubSolv's Signable integration, you are able to generate documents and submit them for a digital signature. You can also then get notified in HubSolv once your document return signed.
This guide will take you through the process of generating documents for an eSignature. To get started, you'll need a Signable account - follow the steps in this article.
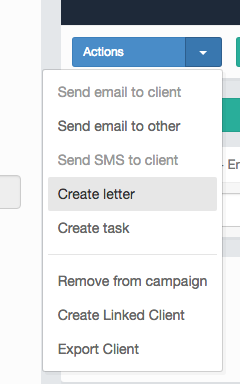
Generating The Letter
When generating the letter, it's important that you have first gone through your document and uploaded it with the correct Signable dynamic fields, so that the customer knows where to sign.
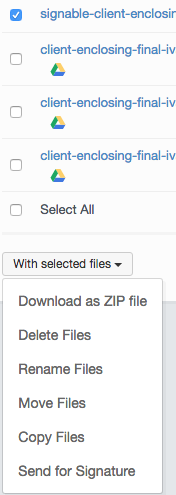
Selecting Client File for Signature
Once your file has been generated, it will be viewable in the client files area.
You can then tick the checkbox for the corresponding file, and select the option 'Send for Signature' from the dropdown menu.
Settings
On the next page, you'll be prompted to enter a few Signable settings to complete the submission process.
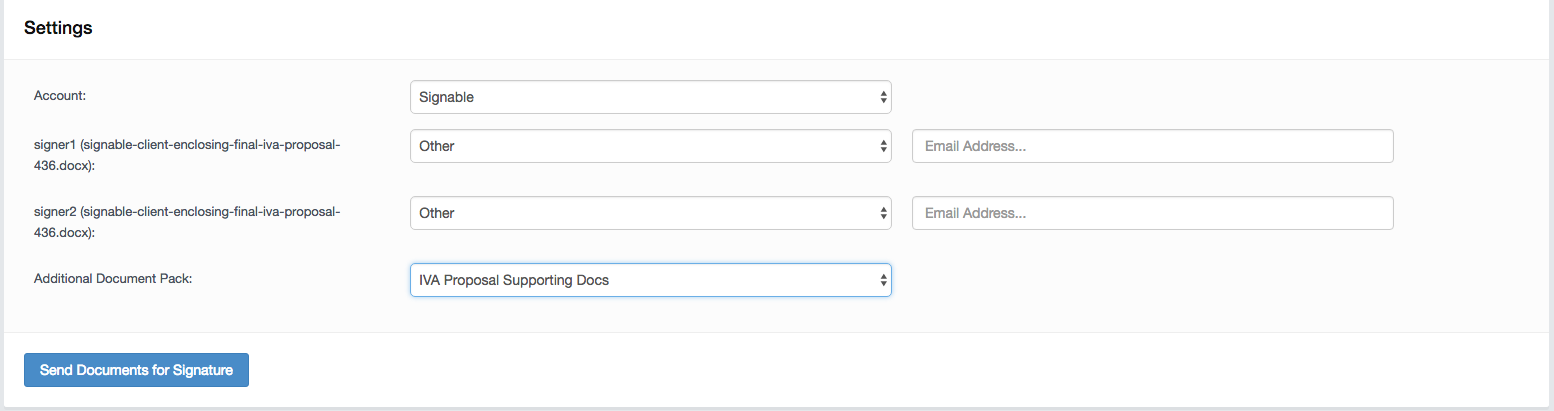
- Account - This should be entered by default unless you have more than one Signable account to select where to send your file from.
- Signer 1 - This field will normally show the email address for the main client, else you'll need to enter it.
- Signer 2 - If a partner client has been entered, this field will normally show the email address for the partner client.
- Additional Document Pack - This allows you to send across an additional document or complementary file that does not require a signature.
Once you have completed this process, your document will be sent and it will be visible within your Signable dashboard.
You can make the most of digital signatures by activating triggers based on relevant actions. For example, you can choose to send an email, or assign a task to a staff member, to be triggered when a document has come back signed. Example and guidance to create triggers can be found here.
Comments
0 comments
Article is closed for comments.